How to Install Django
Updated General, Python
Table of Contents
This tutorial covers how to properly install the latest version of Django (6.0) and Python (3.14).
If you are relatively new to programming, it's likely you have experienced the same frustrations I once did: properly configuring your computer for development. Even in the current age of AI, this is still a challenge. And if you are working with Python and Django, there have been sizeable shifts in how one goes about this in recent years, largely due to rapid advancements in tooling.
In this tutorial, I will go slowly and explain the two dominant methods for setup these days. It is worth noting that the company behind one of the tools here, uv, was recently acquired by OpenAI, and there are open questions around how well-maintained it will be in the long-term. But in the short-term, it works wonderfully and is a powerful tool to consider.
Ultimately, it is not that difficult to change how you install and work with Python or Django. So any decision you make now can be changed later on, if so needed.
The Command Line
You need to use the command line, or terminal, to install Python and Django on your local computer. This is a powerful text-only interface that non-programmers will never use or likely know it, but most developers use it daily. I have a short tutorial, Command Line for Beginners, that I recommend visiting if you are unfamiliar with the basics.
Install Python
The traditional way to install Python is via the official Python website. Visit the Python downloads page and download the installer for your operating system. The MacOS version is seen below, but if you are on Windows then the Windows download will be visible instead.

On Windows, run the installer and make sure to check the "Add Python to PATH" box on the first screen before clicking Install. This is easy to miss and important to get right. After installation, open a new Terminal window and confirm with python --version.
$ python --version
Python 3.14.4
On macOS, double-click the downloaded package to launch the Python Installer and follow the prompts. After installation, open a new Terminal window and confirm with python3 --version.
$ python3 --version
Python 3.14.4
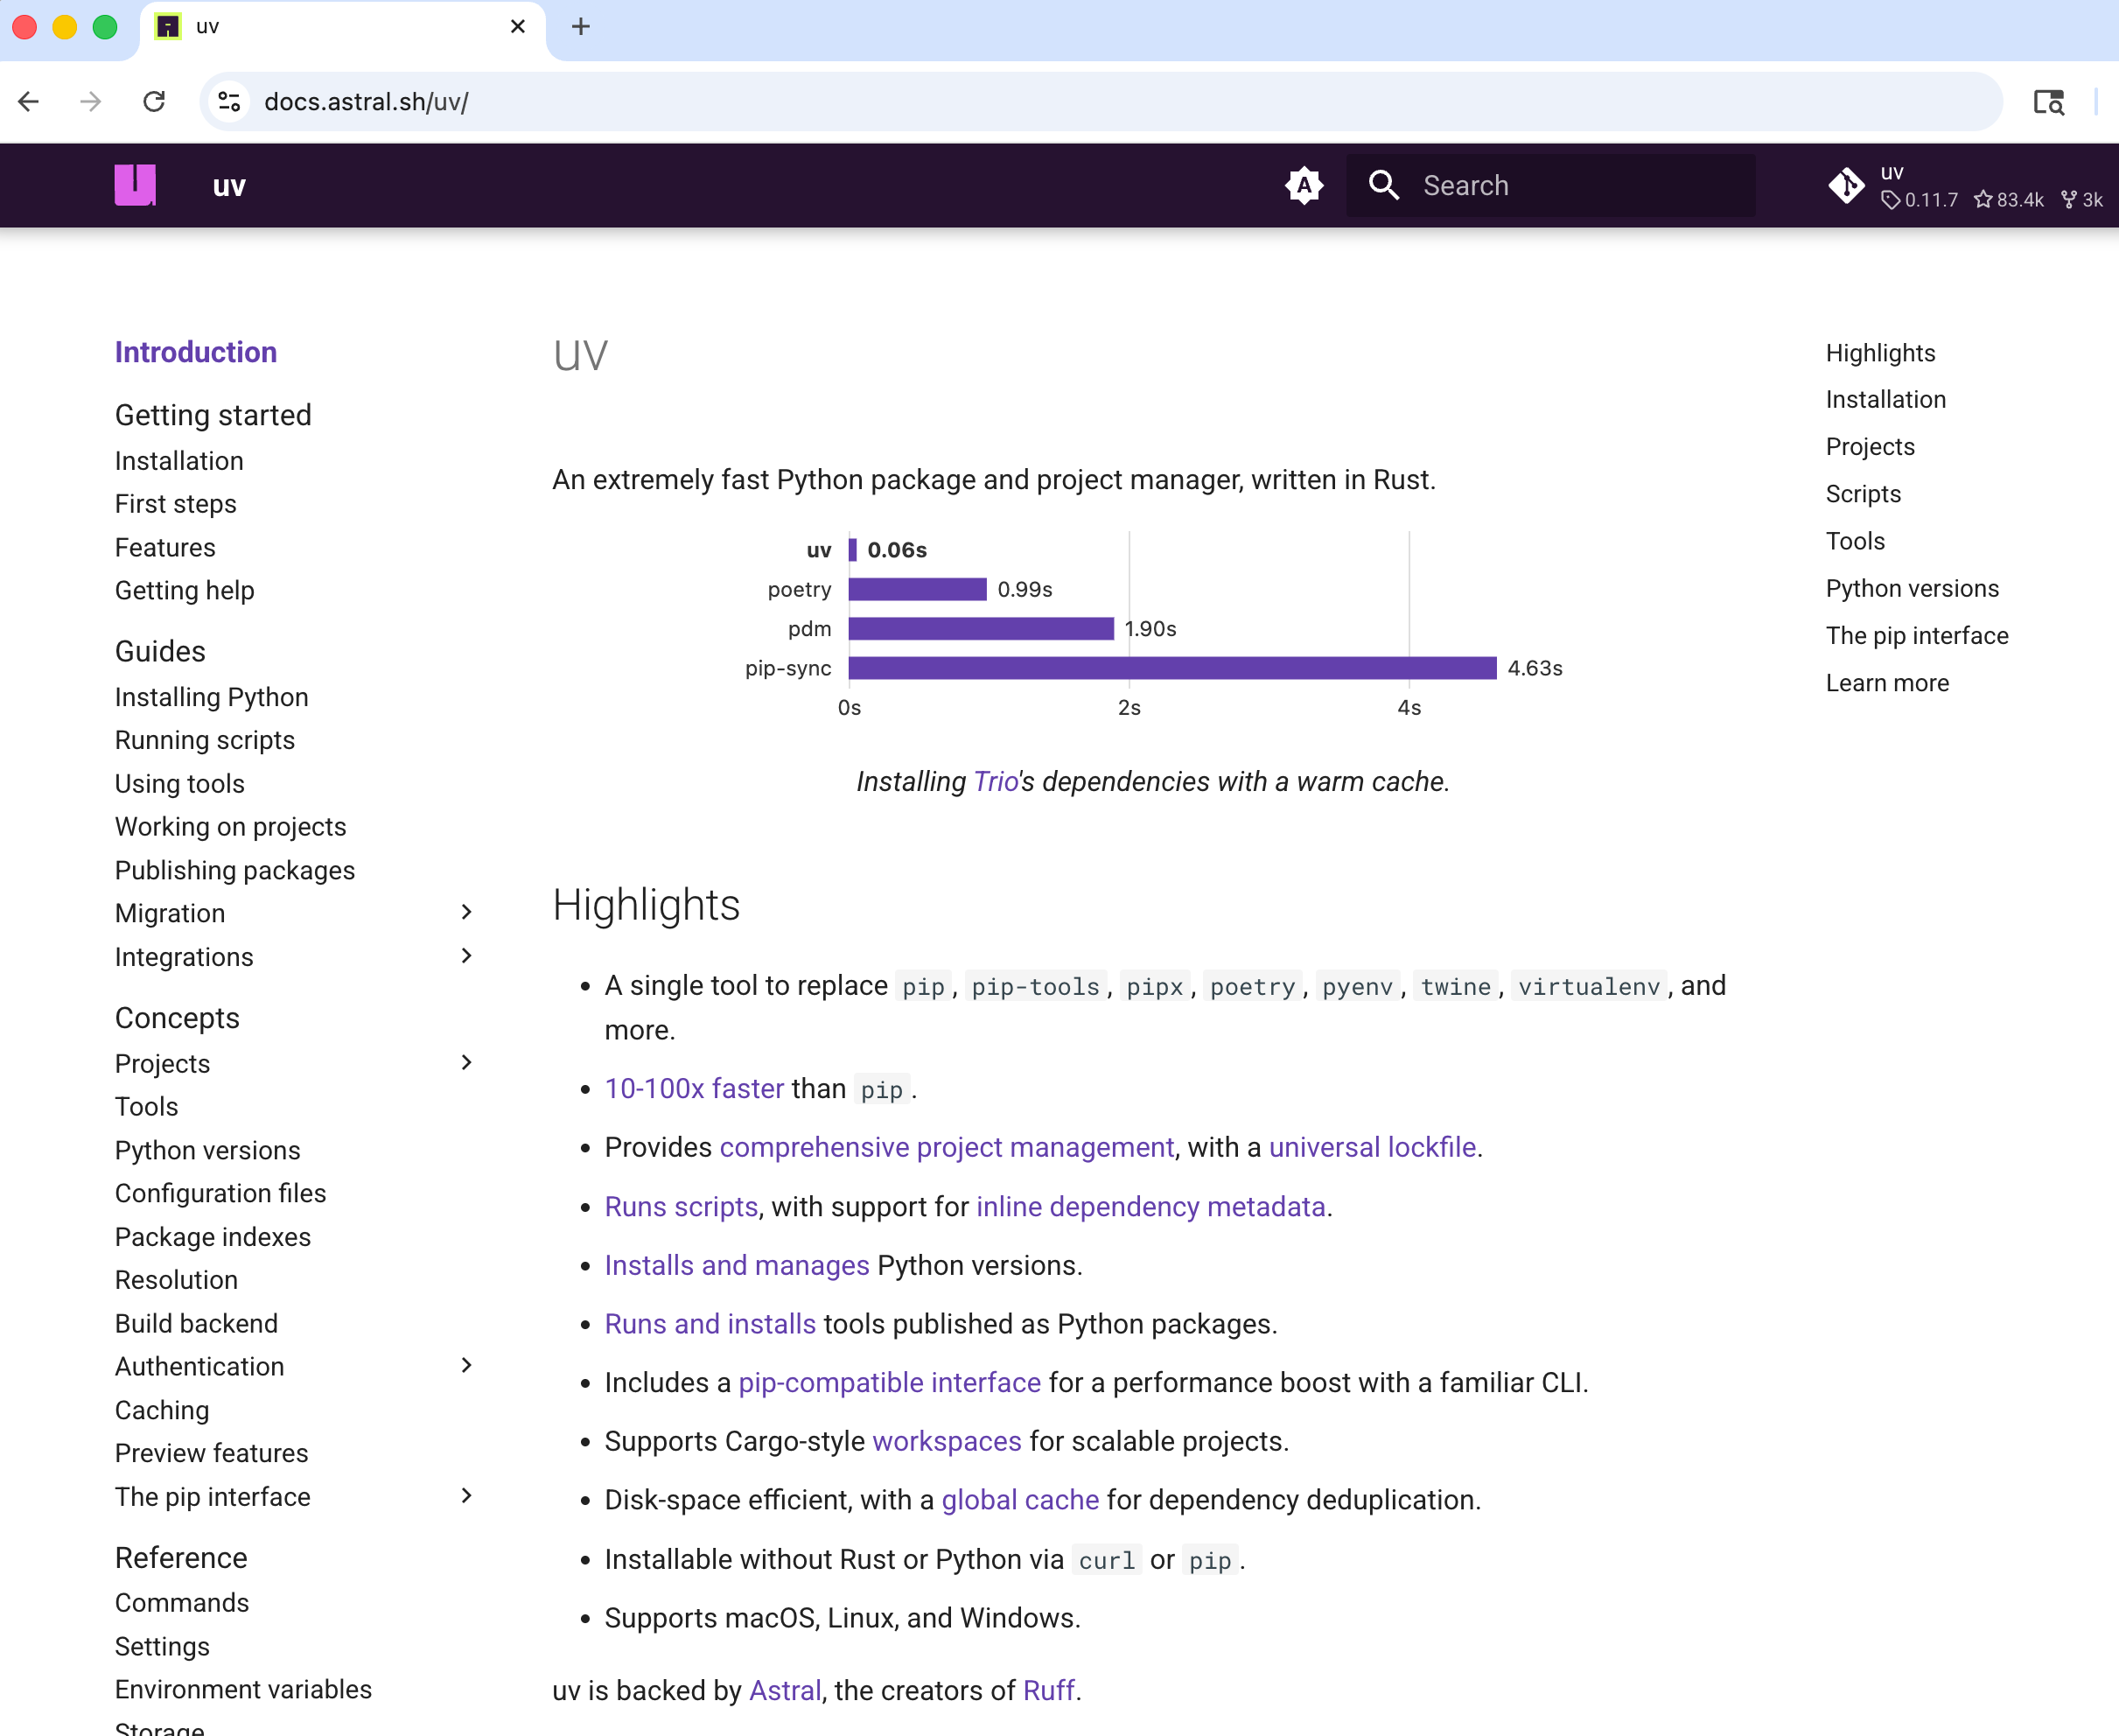
uv
uv is an exciting new approach to Python packaging, a single tool to manage Python and any install packages, like Django. It is written in Rust to be super fast and generally rethinks the entire tooling process for Python. Many developers, myself included, were somewhat reticent to switch but have been won over by the performance of the software and the quality of the team behind it. As noted in the introduction, the team was recently acqui-hired so there is some uncertainty over its long-term future. Nonetheless, I think it is still worth using for now as it brings a number of benefits over the traditional approach.
If you wanted multiple versions of Python on your computer, traditionally that would mean downloading each separately from the official website and switching between them with a tool like pyenv. With uv, this is all much simpler.
The first step is to install uv itself with their official standalone installer. The $ is the beginning of the terminal prompt, so don't copy and paste that part of it.
# macOS and Linux
$ curl -LsSf https://astral.sh/uv/install.sh | sh

# Windows
$ powershell -ExecutionPolicy ByPass -c "irm https://astral.sh/uv/install.ps1 | iex"
Once installed, we can use uv to install Python. For the latest version of Python, use the following command:
$ uv python install
It is also possible to install different versions of Python and seamlessly switch between them with uv, but that is beyond the scope of the tutorial here.
Install Django
From the command line now navigate to a directory on your computer where you want to install Django. One example is to place it on the Desktop. Here's how to navigate to it and create a new directory called django.
# Windows
$ cd onedrive\desktop\
$ mkdir django
$ cd onedrive\desktop\django

# macOS
$ cd ~/desktop/
$ mkdir django
$ cd ~/desktop/django
If you installed Python the traditional way, the next step is to create a dedicated virtual environment so that Django is only installed in this directory and not globally. This is how you can work on Django 6.0 in one project and Django 5.2 in another on the same computer. Each project has a different virtual environment with different packages.
The simplest way to use a virtual environment is with the venv module already installed as part of the Python standard library.
On Windows, there is a one-time setup step required first. PowerShell blocks running scripts by default, so you need to set an Execution Policy to allow it. Run this command once and you won't need to again:
# Windows (one-time setup)
$ Set-ExecutionPolicy -ExecutionPolicy RemoteSigned -Scope CurrentUser
Now create and activate a new virtual environment called .venv:
# Windows
$ python -m venv .venv
$ .venv\Scripts\Activate.ps1
(.venv) $

# macOS
$ python3 -m venv .venv
$ source .venv/bin/activate
(.venv) $
The shell prompt now has the environment name (.venv) prefixed, which indicates that the virtual environment is active. Any Python packages installed or updated within this location will be confined to the active virtual environment.
# Windows
(.venv) $ python -m pip install django~=6.0

# macOS
(.venv) $ python3 -m pip install django~=6.0
Django is now installed in this directory in its own virtual environment! We can quickly start a new Django project and run the local server to check that everything is working.
# Windows
(.venv) $ django-admin startproject django_project .
(.venv) $ python manage.py runserver

# macOS
(.venv) $ django-admin startproject django_project .
(.venv) $ python3 manage.py runserver
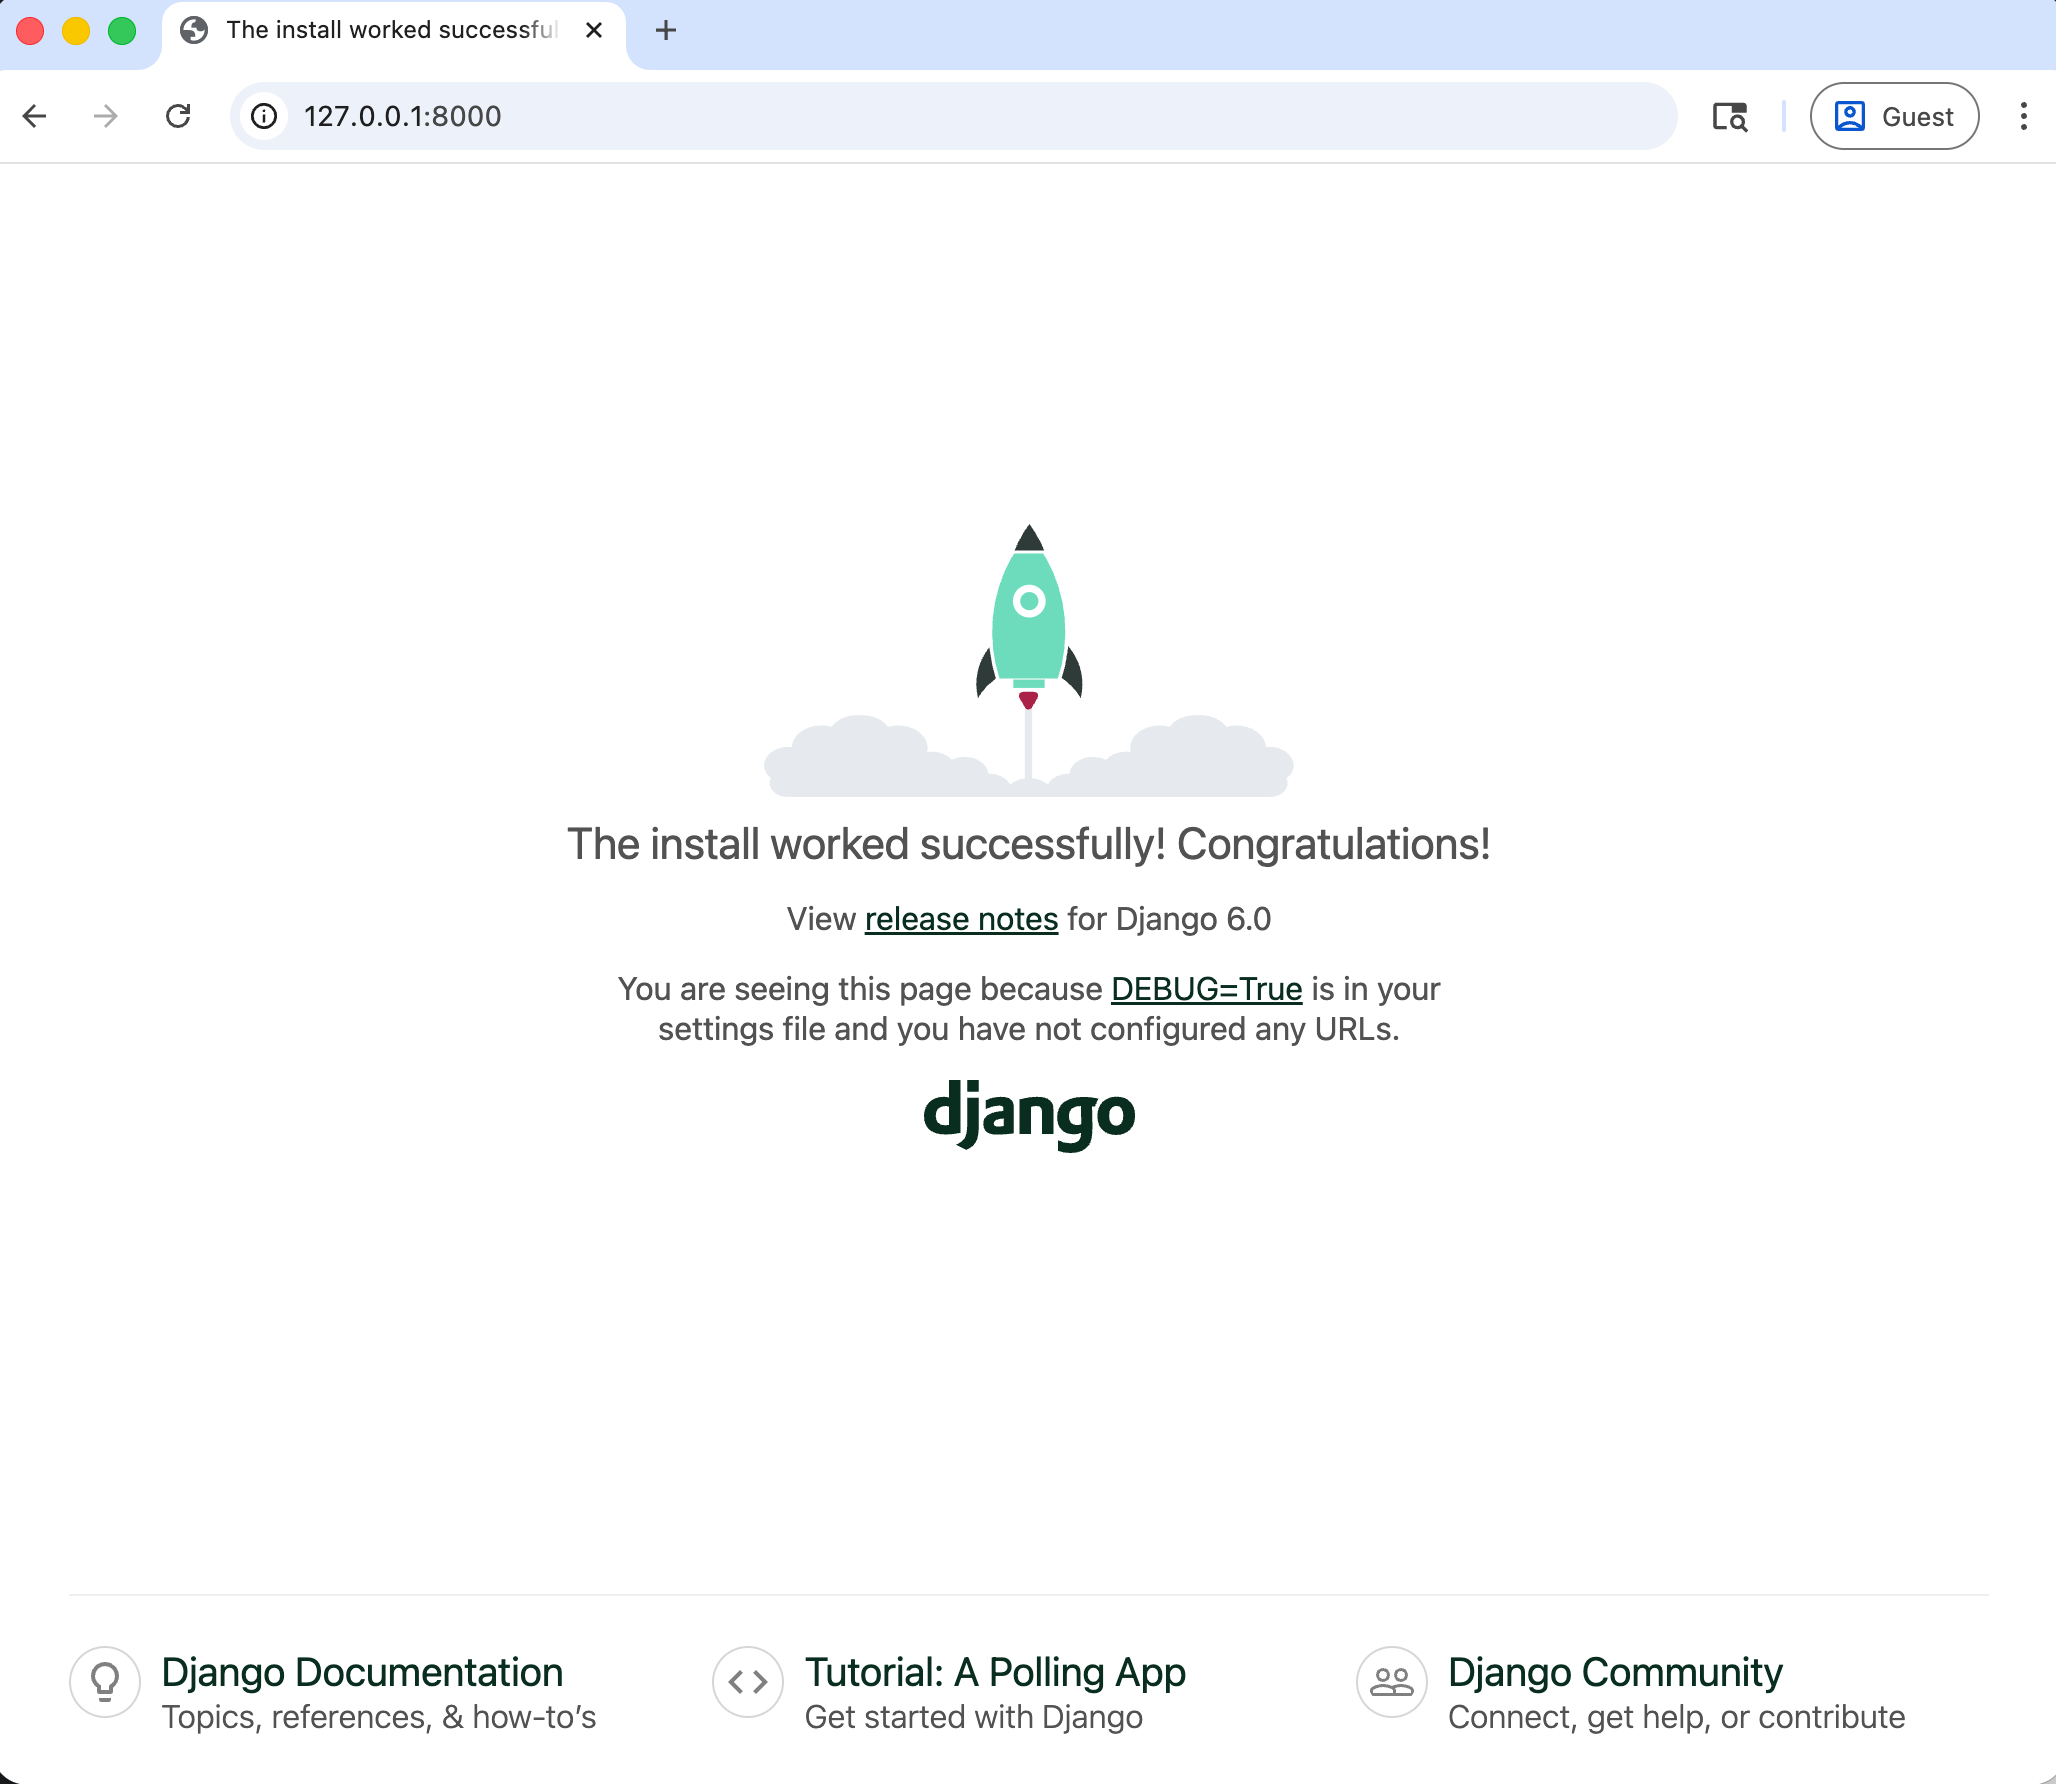
Now navigate to http://127.0.0.1:8000/ in your web browser to see the friendly Django welcome page.
To now try out the approach with uv, type Ctrl+c to stop the local server and then deactivate to exit the current virtual environment.
(.venv) $ deactivate
$
You should see the (.venv) prompt disappear indicating that the virtual environment is no longer active.
Install Django with uv
The uv approach is simpler because uv automatically manages virtual environments — there is no need to manually create or activate one. Navigate to your Desktop and create a new project directory.
# Windows
$ cd onedrive\desktop\
$ mkdir uv_django
$ cd onedrive\desktop\uv_django

# macOS
$ cd ~/desktop/
$ mkdir uv_django
$ cd ~/desktop/uv_django
Initialize a new project and add Django:
$ uv init
$ uv add django
Then we use uv run as a prefix so that uv automatically controls the project's virtual environment for us, without needing to manually activate it.
$ uv run django-admin startproject django_project .
$ uv run python manage.py runserver
In your web browser, navigate to http://127.0.0.1:8000/, and you should again see the Django Welcome Page.
Conclusion
And voila! You have now learned how to install Python, install Django, and start your first Django project. I wish I could tell you to only use one method, but it is hard to say at the moment.
Pick whichever approach feels better to you and know that if need be, it is not that much work to switch from one to the other later on.
You're well on your way to using Django to build powerful websites. For even more tips and advice, check out the book Django for Beginners, which walks you through building, testing, and deploying five increasingly complex projects with Django.